Important Information
This document provides detailed steps for reporting biweekly time. For the detailed steps to report monthly time, refer to Report Your Monthly Time.
The basic steps to report biweekly time are to enter hours or amounts, select the applicable time reporting code(s), then click the Submit button. This document details these steps with screenshots and other important information.
Information on time reporting codes (TRCs)
- A time reporting code (TRC) is a three-character code used to designate the type of time associated with your work and off-work hours. A complete list of TRCs is available via a drop-down menu on the Timesheet page. For help determining the appropriate TRCs and/or hours to report, contact your supervisor or departmental timekeeper.
- Biweekly employees must report regular (REG) hours plus any variations from REG (e.g., vacation, sick time, or overtime).
- Some biweekly employees may be required to enter a Combo Code (ShortCode) in addition to hours and TRCs. Only do this if directed to do so by your supervisor.
Check with your departmental timekeeper or supervisor for departmental guidelines on the deadlines of when you should complete your time entry.
Information about system deadlines- In general, biweekly employees must report both their regular time and their variations to regular time by 7:00 p.m. on the Monday of a pay week.
- It is okay to report time as the pay period progresses, although your time approver may not want you to click Submit until the end of the pay period.
- Employees are able to change time reported in a previous time period. Check with your departmental timekeeper or approver to determine if this applies to you.
Navigation
Wolverine Access > Employee Self Service > Time Reporting
orWolverine Access > Time Reporting
Step-by-Step Process
There are three pages available for time reporting. You do not need to use all three pages to report time. Each page serves a different function, but the result is the same. To ensure your time is reported properly, check the Time Summary page for a complete view of the pay period.
- Enter Time - allows you to enter by week or by period and allows for entry with multiple TRCs.
- Report Time - allows you to enter one or more TRCs one day at a time.
- Weekly Time - allows you to enter one or more TRCs for multiple days.
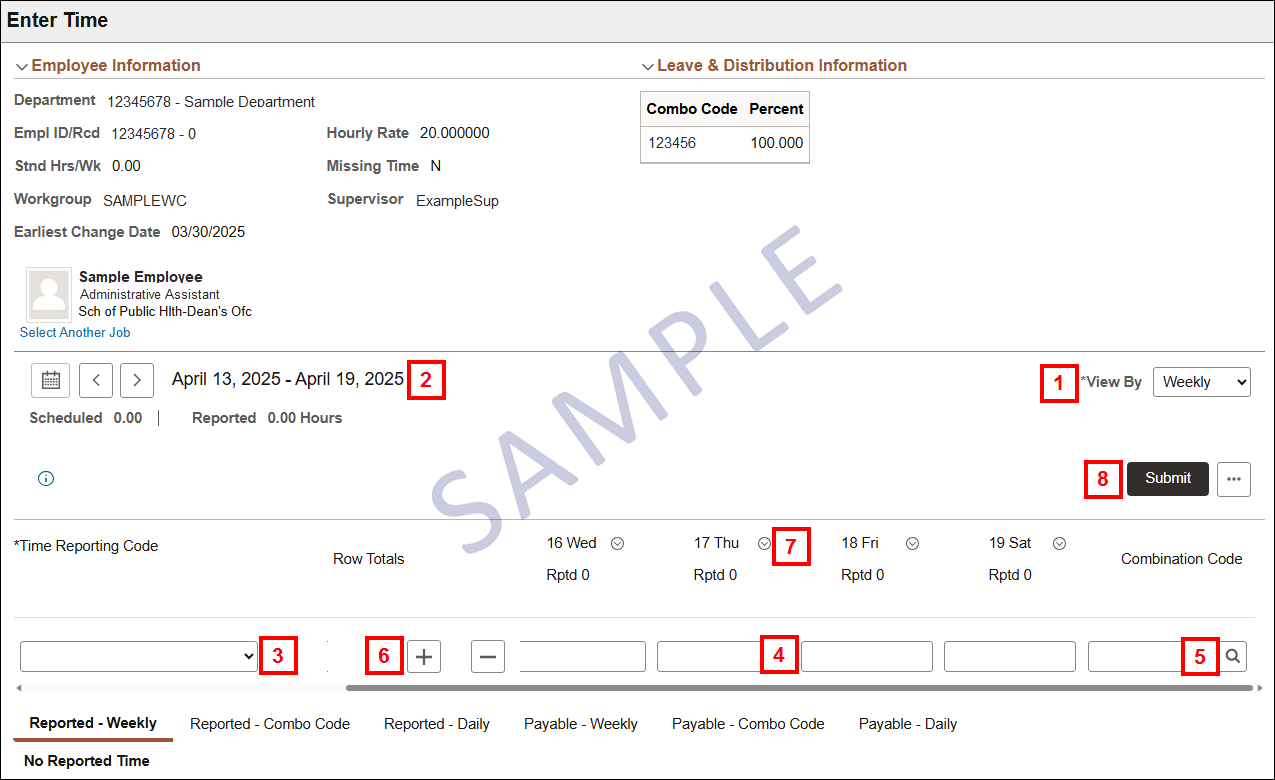
Enter Time Page
- Verify or select the appropriate value in the View By field.
- Bi-Weekly displays a two week period.
- Monthly displays one month at a time.
- Period displays the entire pay period (default, recommended).
- Weekly displays one week at a time.
- Verify the correct week(s)/period/month displays.
- By default, the current pay period displays.
- To change the timeframe displayed, use the calendar to pick a date to display the week(s)/period/month associated with that date.
- You can start the week(s) view with any day of the week, select Weekly or Bi-Weekly from the View By drop-down list and select the date from the calendar.
- If Monthly is selected from the View By drop-down list, the month starts on the date selected.
- Use the Previous Period and Next Period arrows to change the week/period.
- Select the applicable value from the Time Reporting Code drop-down list.
- Enter the hours in the appropriate date field.
- If applicable, enter or Lookup the Combination Code.
- You may need to scroll right view the Combination Code field.
- To add additional rows, click Add Row.
- To add comments, click Related Actions next the the applicable date and then click Add/View Comments.
- After completing your time entry:
- If you want to save your entries without submitting your timesheet for approval, click the Action Changed Flag (...) button and click Save for Later. However, you must return to the timesheet before the end of the pay period to click Submit.
- Click Submit to submit your time for the pay period. If your approver opted to receive approval email notifications, he/she will receive an email. You can make changes and click Submit again if necessary to report more time.
Make Changes to Your Reported Time
Note: If you need to change the time reported for the current period or for a prior period (up to six prior months), you can do so up to the data entry deadline and submit again.
- As needed, overwrite or delete the hours in existing Time Reporting Rows.
- To delete a row, which includes all hours or amounts for a TRC, click Delete Row.
- For each new TRC, click Add Row and enter appropriate values in the TRC and date fields.
- After changing your reported time, you must click Submit.
Enter Combo Codes (ShortCodes)
Some employees may be required to enter a Combo Code (ShortCode) in addition to hours and TRCs. Only do this if directed to do so by your supervisor.
Guidelines:
- Temporary biweekly employees can enter a Combo Code for both their REG and other types of hours.
- Regular biweekly employees should not enter a Combo Code for their REG hours, but can for other hours such as ESA, ONC, or OTP.
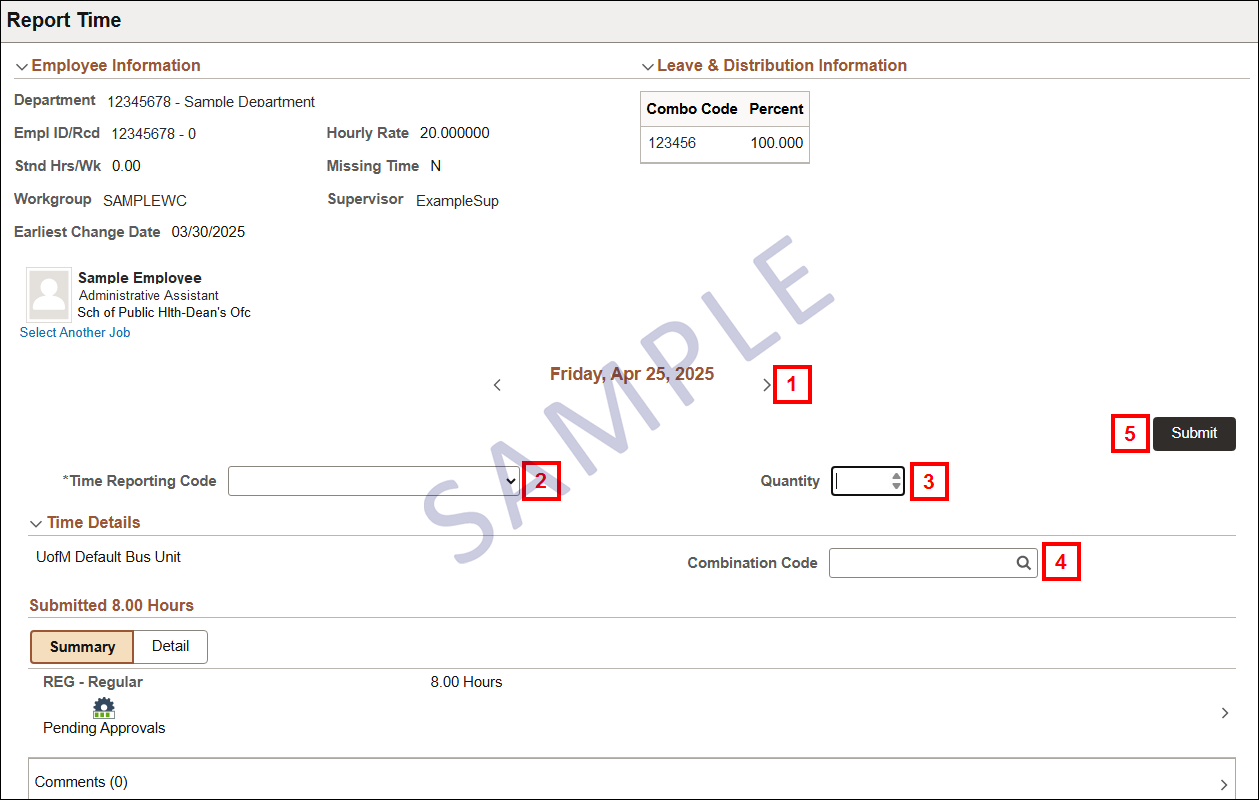
Report Time Page
- Verify the correct date displays.
- Select the applicable value from the Time Reporting Code drop-down list.
- Enter a Quantity.
- If applicable, enter or Lookup the Combination Code.
- Click Submit.
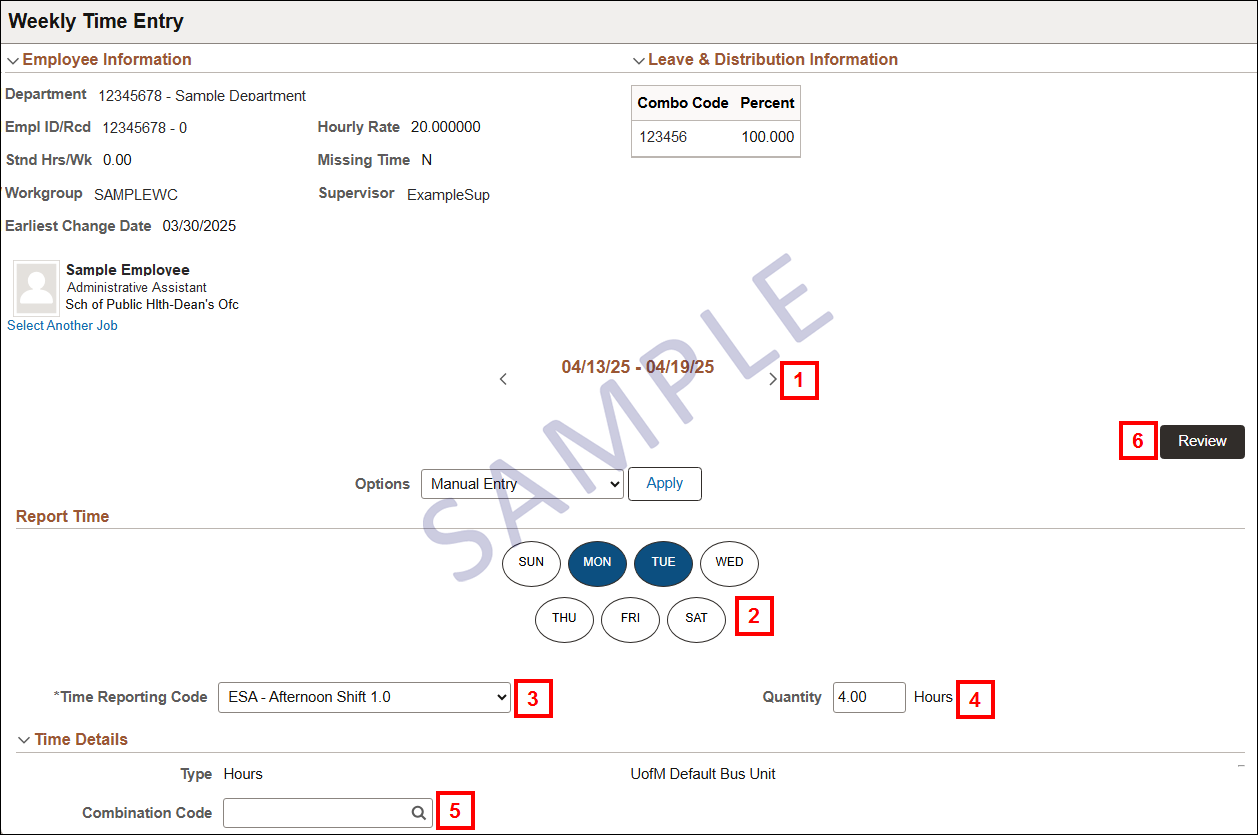
Weekly Time Page
- Verify the correct week displays.
- Click the applicable days of the week.
- Select the applicable value from the Time Reporting Code drop-down list.
- Enter a Quantity.
- If applicable, enter or Lookup the Combination Code.
- Click Review.
- Review the page displayed and then click Submit (not pictured).
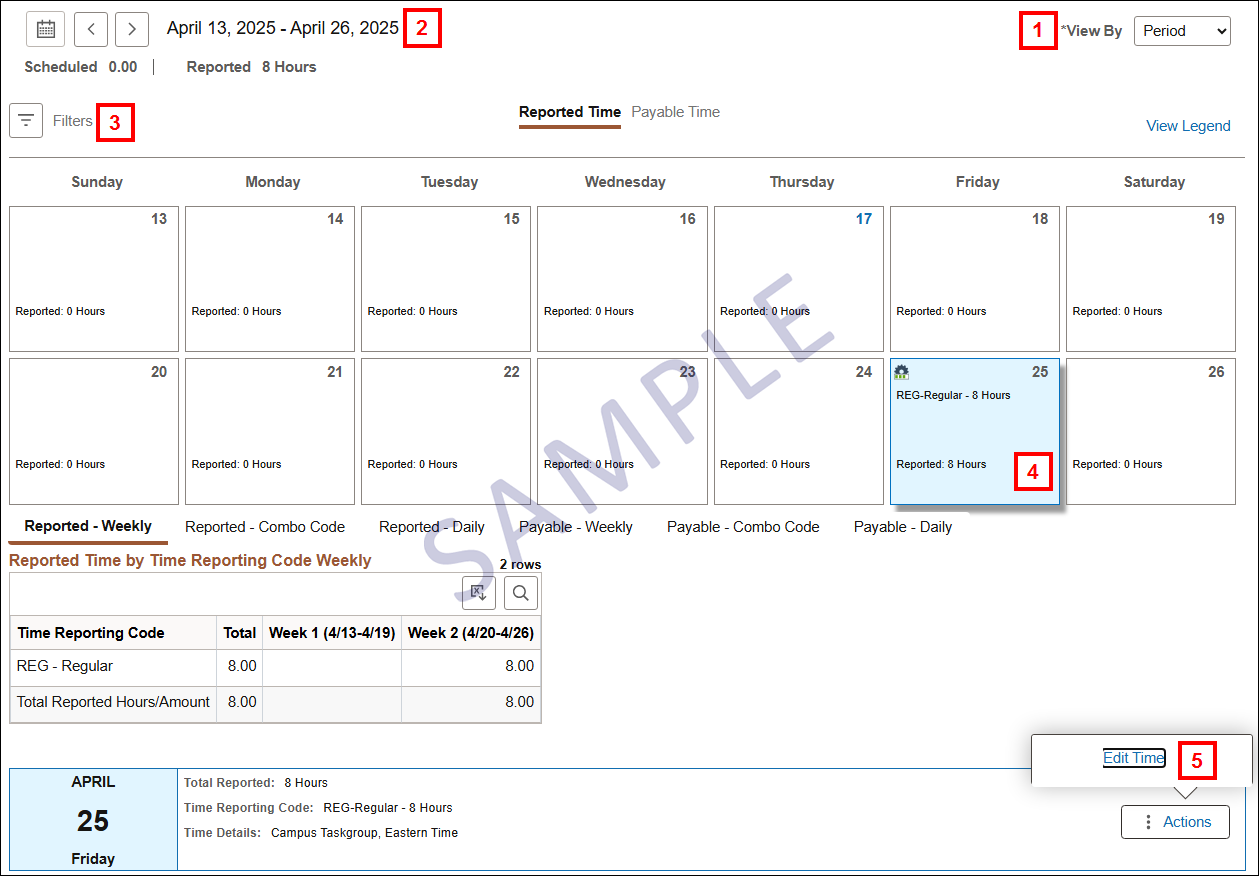
Time Summary Page
- Verify or select the appropriate value in the View By field.
- Verify the correct week/period displays.
- Use the calendar to pick a date to display the week/period associated with that date.
- Use the Previous Period and Next Period arrows to change the week/period.
- If applicable, click Filters to view results based upon parameters (e.g., University Holidays, Time Reporting Code, Reported status etc.).
- Click a specific date to view additional information on the time reported for the day in the box below.
- To change the reported time, click Actions.
- Depending on the time already reported, the Actions button allows you to Edit Time or View Exceptions.